 gb
gb


 View larger


Compatible display window Sony Xperia Go st27i
PMFR1510
New
Touch screen compatible with the Sony Xperia Go st27i
Videos

Data sheet
| Pre-gluing of the glass: | No: Not systematic: It is necessary either to recover the old one, or to buy adhesive "quarter rolls 2mm" |
| For what type of breakdown? | Typical Touch Problems: Touch sensitivity fault, the keypad does not respond but the picture works well, can not enter the PIN code, screen that remains frozen on the logo when starting. |
More info
9.99Vitre compatible touchscreen touch screen to repair my Sony Xperia Go st27i
Because this product has a very high durability and we have maximum confidence in it, we extend its warranty to 2 years, so you can buy it with eyes closed!
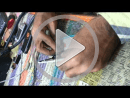
Express Tutorial:
We offer a quick tutorial to get an idea of the repair globally below. You also have access to a repair tutorial of the Sony Xperia GO for free in the guide sections, complete and more detailed (especially in the photos).
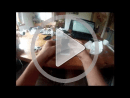
Start with the basic operations, phone preparation (protection) backup, remove battery cover SIM card and SD ect ..
There are 8 screws of 2 types to unscrew. Note the location to avoid reversing. 
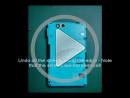
Before opening the rear frame, be careful to see that there will always be two large layers fixed, one will have to be careful when opening. The rear chassis is easier to unclip on the lengths.

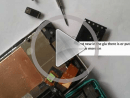
You can heat up to 250 °, be careful the LCD fears beyond 180 ° see below, do not heat too ready nor trOp long.
Attack by the top left part of the window.
As you advance your spatula, continue heating, as you can not heat hard or long, so you will have to alternate quickly. Keep the spatula in the extended position, so as not to scratch the LCD. 
You can then place the glass but before you think of cleaning all the glue residue and also place the glass tablecloth in place before removing any film.
Do not hesitate to use the film protecting the glass on the LCD side to clean the dust on the LCD by static electricity.
Then place the glass in its place and care for the bonding so as not to create over-thickness. 
When reassembling the display unit on the motherboard, remember to reassemble the two previously disassembled sheets. These are single pins. 
There you goYour St27i is like new!


Accessories
Delivery Date
Order before 14 h
for delivery between 02/05 and the 05/05/26
Approximate date using Suivi GRATUIT moreInfo